Hello Fellow Fotogs,
I’m going to share My Way of managing photo files and catalogues. Some of you have already heard some of this, but I’d like to go further in depth and do it over a few emails. It’s a very simple process, but over the years, it has worked great for me.
Some of you probably have different methods, and that’s fine, use them. This is for anybody that might want to use these tips if they are struggling at all with organizing their photo libraries.
To start, every December 31st, I make a new sub-folder in my Pictures Folder and name it “Photos (insert the Year here)”.
Like what I did this year as an example…Photos 2020. (see screen shot)
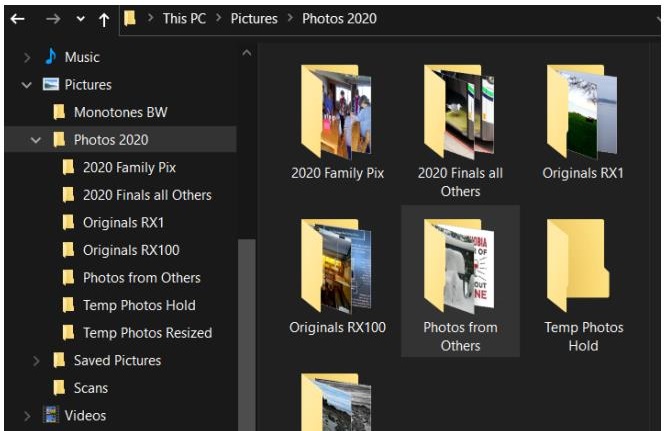 In that folder, I’ll make sub-folders…
- 2020 Family Pix (for edited and finished photos of family members, etc.)
- 2020 Finals All Others (artsy, everyday photos, edited and sharpened)
- Originals from (your camera here)
- Originals from (another camera here)
- Photos from others (anything I download from relatives, etc.)
So, once that’s done I’m ready to select the photos from my SD card and drop them all in the Originals folder that is set up for either camera, since I use two different cameras. The Original files will always stay in their respective folder, unless they are total crap and get thrown out.
This is where the editing process starts…Look through your originals any time you want, and open the one you want to edit in your application.
When you are done editing, cropping, colour correcting, etc., now is the time to save it in one of your 2020 Finals folder. You MUST do a “SAVE AS” with a modified file name that is different from your original. This will prevent you from overwriting and losing your original photo. I usually save my finished photos as Jpegs. You always want to keep your original intact, because you never know how much you might learn in the future to make an even better version some day!
So, you did your Save As, but the little trick I do to each file name, to make it different from the original, is add “es” to the end of the file number.
For example: DSC01237.JPG becomes… DSC01237es.JPG
That way, the files are kept in sequential order all through the year in all the folders, and you immediately know that that file was edited and sharpened. Hence the “es”. And you original stays intact!
Now that you’ve seen how I start my new year with fresh picture folders, the other thing that you need to do is start backing up these new folders to a separate external hard drive. You’ve no doubt heard of Back-Ups?
I have two external hard drives and I copy and paste any new stuff to each of them. I like to do this all manually, but there are apps that can make this happen automatically, but I would rather know what’s being done myself, rather than depending on somebody else.
I would recommend backing up to two places in addition to your computer or laptop storage. Even if you back up to memory sticks, at least you have a solid way to keep things safe. You can’t depend on only your computer to keep your memories.
Backing up on Google Photos is another way to have at least a second copy of your libraries, which you can access in case you lose your computer files. You can make photo albums in Google Photos that match the titles of the ones you have on your computer and your back-ups.
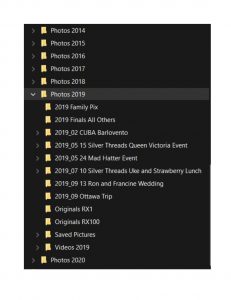 Ok, if you look at the attached screenshot picture of one of my external HDDs, you will see what I did for last year’s collection of photos. There are the basic folders and some additional folders of special events and travel trips.
Because everything that was in my computer’s 2019 Photos folder has been copied to the external hard drives, the whole collection of 2019 photos can now be deleted from the computer, freeing up valuable space. Just make sure you have good backups!
Pages: 1 2